


























































GreenVisuaLED
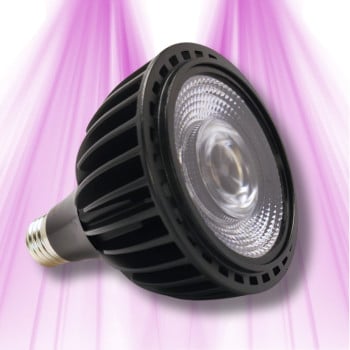
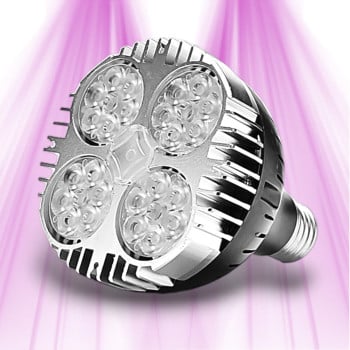
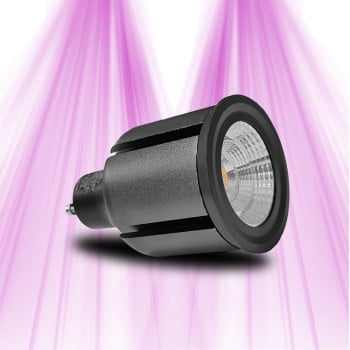
Ampoule horticole LED GU10 - Idéale pour plantes vertes, bonsaïs ou cadres
En stock · Expédié sous 24 h
13,90 €

Produit ajouté au panier avec succès
Ça pousse dans le bon sens

20 produits
Les compléments d'éclairage sont ces petits plus qui font toute la différence dans une installation de culture indoor. Réflecteurs Mylar, lampes vertes pour l'inspection nocturne, timers programmables ou panneaux réfléchissants - chaque élément joue un rôle précis pour maximiser le rendement lumineux de votre espace de culture. Contrairement à l'éclairage principal, ces accessoires viennent optimiser la distribution et l'utilisation de la lumière existante.
Franchement, c'est souvent là que se joue la différence entre une culture correcte et une culture vraiment efficace. Un bon réflecteur peut augmenter l'intensité lumineuse de 30 à 40% sans consommer un watt supplémentaire. Les panneaux Mylar réfléchissent jusqu'à 95% de la lumière contre seulement 60% pour du blanc mat. Et quand on sait qu'une HPS 600W coûte environ 0,15€ de l'heure en électricité, optimiser chaque photon devient vite rentable.
Les lampes vertes permettent d'inspecter les plantes pendant la période d'obscurité sans perturber leur cycle photopériodique. La chlorophylle absorbe très peu la lumière verte (520-570nm), ce qui rend ces lampes invisibles pour les plantes. Pratique pour vérifier l'humidité du substrat ou détecter des problèmes sans stresser la culture.
Les timers programmables, eux, garantissent une régularité parfaite des cycles lumineux. Un décalage de quelques minutes par jour peut suffire à déclencher une floraison prématurée ou des hermaphrodites. Les modèles numériques offrent une précision à la minute près sur plusieurs semaines.
Pour les réflecteurs, tout dépend de votre configuration. Un réflecteur parabolique concentre la lumière sur une zone réduite (idéal pour 80x80cm), tandis qu'un réflecteur wing étale la lumière sur une surface plus large (jusqu'à 120x120cm). Le matériau compte aussi : l'aluminium anodisé réfléchit mieux que l'aluminium simple, mais le Mylar texturé reste le top avec 98% de réflexion.
Pour les panneaux réfléchissants, évitez le papier alu de cuisine qui crée des points chauds. Le Mylar en rouleau de 125 microns offre le meilleur rapport qualité-prix. Comptez environ 2m² de surface réfléchissante par m² de culture pour couvrir les parois efficacement.
Côté timers, les modèles mécaniques (15 minutes de précision) suffisent pour l'éclairage principal, mais les versions numériques deviennent indispensables pour programmer des cycles complexes ou gérer plusieurs zones. Vérifiez la charge maximale supportée : 2000W minimum pour une installation sérieuse.
La distance dépend du type de complément utilisé. Pour une lampe verte d'inspection, vous pouvez descendre à 30-40cm sans risque puisqu'elle émet très peu de chaleur et reste invisible pour les plantes. Les réflecteurs ne génèrent pas de chaleur supplémentaire, ils redistribuent juste la lumière existante - c'est donc votre éclairage principal qui détermine la hauteur. En revanche, si vous ajoutez des spots LED complémentaires, respectez 40-50cm minimum pour éviter le blanchiment des feuilles. Surveillez toujours la température au niveau des apex : elle ne doit pas dépasser 28°C.
Les réflecteurs sont universellement compatibles - ils se contentent de rediriger la lumière sans interférer avec votre ballast ou votre ampoule HPS. Vérifiez juste que les dimensions correspondent à votre espace de culture. Pour les lampes vertes, aucun problème de compatibilité non plus : elles fonctionnent indépendamment de votre éclairage principal. Vous pouvez même les utiliser pendant que vos HPS sont éteintes. Le seul point d'attention concerne l'alimentation électrique : assurez-vous que votre installation peut supporter la charge supplémentaire, même minime (5-15W pour une lampe verte).
En croissance, l'éclairage complémentaire suit généralement le même cycle que votre éclairage principal : 18h allumé, 6h éteint. C'est le cas pour les spots LED d'appoint qui viennent renforcer l'intensité lumineuse. Par contre, les lampes vertes peuvent rester allumées en permanence si besoin - elles n'influencent pas la photopériode. Pour des réflecteurs ou panneaux Mylar, pas de programmation nécessaire puisqu'ils travaillent passivement. Si vous utilisez des LED UV-B en complément, limitez-vous à 2-3h par jour maximum pendant les dernières semaines de croissance pour durcir les plantes sans les stresser.
Fixez le Mylar bien tendu sur toutes les parois, en évitant les plis qui créent des zones d'ombre. Utilisez du scotch double-face spécial ou des clips plastique pour ne pas percer le matériau. Laissez 2-3cm d'espace entre le Mylar et la paroi de la tente pour éviter la condensation. Positionnez-le côté brillant face aux plantes, évidemment. Pour les angles, découpez des encoches en V plutôt que de plier - ça évite les surépaisseurs. N'oubliez pas le sol : un tapis réfléchissant peut récupérer 10-15% de lumière supplémentaire. Remplacez le Mylar dès qu'il jaunit ou se déchire, car il perd rapidement son efficacité.
Absolument, la poussière peut réduire l'efficacité de 20-30% en quelques semaines. Pour le Mylar, utilisez un chiffon microfibre légèrement humide avec de l'eau déminéralisée - jamais de produits chimiques qui ternissent la surface. Nettoyez délicatement sans appuyer pour éviter les micro-rayures. Les réflecteurs en aluminium supportent un nettoyage à l'alcool isopropylique à 70%. Pour les lampes vertes, un simple dépoussiérage suffit. Programmez ce nettoyage toutes les 2-3 semaines en culture, plus souvent si vous utilisez des produits foliaires. Un Mylar propre peut faire la différence entre 400 et 500 µmol/m²/s au niveau des plantes basses.
Existe en 3 modèles
Existe en 3 modèles
Existe en 2 modèles
Existe en 2 modèles
Existe en 2 modèles
Existe en 2 modèles
Existe en 2 modèles
Aide & conseils
Sur Complément — cliquez une question pour voir la réponse.
Pour choisir un complément d'éclairage, je vous conseille de d'abord évaluer les besoins spécifiques de vos plantes et les lacunes de votre éclairage principal. Si vous manquez d'intensité, un réflecteur performant sera utile. Si c'est la distribution lumineuse qui pose problème, des panneaux réfléchissants peuvent aider. Pensez aussi à la phase de croissance : certains compléments sont plus adaptés à la floraison, d'autres à la croissance végétative.
La principale différence, c'est leur rôle et leur forme. Les réflecteurs Mylar sont généralement intégrés directement à votre luminaire principal pour diriger et concentrer la lumière vers les plantes. Ils sont conçus pour maximiser l'efficacité de la source lumineuse. Les panneaux réfléchissants, comme ceux en Mylar ou en film blanc, sont eux placés sur les parois de votre espace de culture pour renvoyer la lumière diffuse et éviter les pertes. Ils assurent une meilleure homogénéité de l'éclairage sur l'ensemble de la canopée.
Les lampes vertes sont un outil précieux pour l'inspection nocturne de vos cultures. Ce que je vois souvent, c'est que les plantes ne perçoivent pas le spectre vert de la même manière que les autres couleurs. En utilisant une lumière verte, vous pouvez observer vos plantes, détecter d'éventuels problèmes (maladies, parasites, carences) sans perturber leur cycle de sommeil (photopériode). C'est crucial pour ne pas stresser vos cultures et maintenir un rythme circadien sain.
Installer un timer programmable est assez simple et c'est un incontournable pour toute installation indoor. Je recommande de le brancher entre votre prise secteur et votre système d'éclairage. Ensuite, il suffit de programmer les heures d'allumage et d'extinction selon le cycle lumineux dont vos plantes ont besoin (par exemple, 18h de lumière / 6h d'obscurité en croissance ou 12h/12h en floraison). Assurez-vous que le timer est adapté à la puissance de votre éclairage pour éviter toute surcharge.
La puissance d'un complément d'éclairage dépend vraiment de votre éclairage principal et de la taille de votre espace. Si je devais choisir, je dirais qu'il faut d'abord évaluer la surface à couvrir et le type de culture. Pour des réflecteurs, la puissance est celle de votre lampe principale. Pour des barres LED complémentaires, cela dépendra des zones d'ombre ou des besoins spécifiques en spectre. L'objectif est de combler les manques, pas de sur-éclairer, ce qui pourrait stresser les plantes.
Avec les compléments d'éclairage LED, la première erreur à éviter est de ne pas optimiser la distance. Une LED trop proche peut brûler les plantes, trop éloignée, elle perd en efficacité. Je vois aussi souvent des erreurs dans le choix du spectre : assurez-vous que le complément apporte ce qui manque à votre éclairage principal. Enfin, ne négligez pas la ventilation, car même si les LED chauffent moins que d'autres technologies, une bonne circulation de l'air reste essentielle.
Pour savoir si un réflecteur est adapté, je vous conseille de regarder son taux de réflexion et sa capacité à distribuer la lumière uniformément. Un bon réflecteur doit avoir un taux de réflexion élevé (souvent supérieur à 90% pour le Mylar de qualité) et une forme qui dirige efficacement la lumière vers la canopée, sans créer de points chauds ou d'ombres excessives. La taille du réflecteur doit aussi correspondre à la taille de votre lampe et à la surface de culture pour une efficacité maximale.
Pour maximiser le rendement lumineux, je recommande fortement d'investir dans de bons réflecteurs et des panneaux réfléchissants de qualité. Un réflecteur bien conçu, comme ceux en aluminium martelé ou en Mylar haut de gamme, peut augmenter significativement la quantité de lumière atteignant vos plantes. Les panneaux réfléchissants sur les parois de votre espace de culture sont également cruciaux pour récupérer la lumière diffuse et la renvoyer vers les plantes, assurant une couverture plus homogène et réduisant les pertes.
L'optimisation de la distance est essentielle. Pour les compléments d'éclairage, comme les barres LED latérales ou les spots, je recommande de les placer de manière à ce qu'ils éclairent les zones d'ombre ou les parties basses de la canopée qui ne reçoivent pas suffisamment de lumière de l'éclairage principal. La distance exacte dépendra de la puissance du complément et de la sensibilité de vos plantes, mais l'objectif est d'assurer une distribution lumineuse homogène sans causer de stress thermique ou lumineux direct. N'hésitez pas à observer la réaction de vos plantes et à ajuster en conséquence.
Vous ne trouvez pas votre réponse ? 01 88 33 45 52 ou par message.

Satisfait ou remboursé
14 jours

Livraison offerte
dès 89€*

Livraison
24 à 48H

Paiement
sécurisé

Facilités de
paiement

Meilleurs prix
garantis

Garantie
GrowLED

Points de
fidélité